Monday, December 17, 2012

"Resetting—please wait..."

On 16 November I posted a note about a 7900 resetting issue friend Dean had experienced with his printer. He explained a bit in a posting to the Luminous Landscape forums. That thread's not been active lately, but in private emails Dean's mentioned the problem has recurred several times. I'd never seen the issue here. Dean uses a Win7 system and connects to his 7900 via USB. I use a Mac, and my printer is on the wired network.

Thinking the problem may be a failing USB port on his computer's motherboard, Dean switch to a different port. I haven't heard whether he's experienced the problem since.

[Update 19 December: The problem hasn't recurred since Dean switched to a different USB port.]

Yesterday, it happened to me, which probably eliminates the USB port as the likely cause.

I had some unusual circumstances leading up to the problem. My 7900 has been powered-up for most of a year. When not in use it goes into standby mode. Last week, however, the local power utility scheduled an outage that was to last up to two hours. I powered down the printer and switched off its UPS. As I didn't expect to be printing soon, I left the machine off after the power to the mains was restored.

Yesterday I received, via email, a print job. The client needed it right away, and I had the time to accommodate him. This required a switch from PK to MK. I powered up the printer and watched as it went through its start-up routine. I printed a nozzle check and found LC almost completely gone. I did the black ink swap. Going in the PK to MK direction, the printer does not force a cleaning as it does when switching from MK to PK. When the swap completed, I initiated a cleaning of the LC/VLM pair. That successfully cleared the LC nozzles; no other nozzle issues were found.

I set up the print job, which was for ten of the same print. I set the quantity to five, and then moved to the printer to start feeding sheets. The first print started normally, but when about one-third complete, it ejected from the printer. The LCD showed "Resetting, please wait..." Uh-oh. This is the problem Dean reported.

I removed the sheet of paper, and then at the computer canceled the job. I found no complaints or messages from the printer driver; everything looked normal. I checked the status lights on the 7900's network port and on my 16-port gigabit switch. All looked normal, no change from the way things have appeared for more than a year.

Once again I set up the print job, this time with a quantity of one, and for plain paper. I fed a sheet of plain bond and once again got the resetting error. In addition, I'd made a mistake with the layout, setting the sheet orientation incorrectly, so this test would have failed anyway.

OK, third time's a charm, right? I set up the job again, quantity of one, with the proper mat paper and the correct orientation. The print was perfect. I set up again, quantity of two, and got two perfect prints. I finished the first half of the job by printing two more copies, also without problems.

Finally, I set up again, quantity of five, and got five perfect prints.

I'm in the dark on this. No idea what failed or why. The Mac OS keeps logs of everything (perhaps Windows does, too). I found this in the CUPS (print architecture) log:

E [16/Dec/2012:16:22:01 -0700] [Job 19] Remote host did not accept data file (2).
E [16/Dec/2012:16:31:48 -0700] [Job 20] Remote host did not accept data file (2).

It corresponds to the times I saw the errors on the printer, but it's otherwise not real helpful. A quick look with Google didn't provide any help decoding the CUPS messages. More research required. I also checked the job history in the print driver. No errors are listed; it seems this is not a log in which errors would appear.

  --Jay

Wednesday, December 5, 2012

Printing with Photoshop CS6

As described at length in my last posting, I'm now using the most recent Mac OS (OS X 10.8.2, "Mountain Lion") and the most recent version of Photoshop (CS6) on my Mac Pro. I'm also using the latest Epson printer driver for the Mac, 9.04, although I'd been using this for a while with older versions of Photoshop and OS X.

Today I made my first print with the 7900 and the new combination of software. I optimized my photo in the usual way; with the exception of the new (and very interesting) process version in Adobe Camera Raw (ACR), that being PV2012, there's little change to my workflow with CS6. I've read from several sources that soft proofing has been improved in CS6; that may be true, but I'll need to work more with that before I can say for sure. In any case, getting ready to print is straightforward.

However, the print dialog is new, and different in several ways. I was surprised at the new layout of the print dialog. Having never seen the Windows version of this, I'm not sure how different the Mac version is. In the previous version with CS5, a full-height right pane contained the color set-up options. To the left of that another pane had sizing, quantity, scale, and a few other options. Those two panes filled roughly half of the big dialog box. The preview pane filled the left half.

Now, all of the old set-up options (and more) are in a single, scrolling pane on the right, while the preview remains on the left. Here's the good part: the preview is surrounded by a white border, and that has edges with slash marks. By default a black background surrounds the preview. While there may be some good reasons for that black border, I thought it made the preview image appear very bright, and I didn't care for the contrast with the settings pane on the right. I discovered right-clicking in that black border exposes a menu with some gray shades and a "custom" option to set any color. I chose the darker gray. Click the image below for a larger view.


The white around the image is the print area. The slash marks, representing the unprintable area, show the edges of the full sheet. I think this is excellent. After making the print and comparing, I found this representation of the print position on the sheet to be quite accurate. You can see the total bottom border is significantly wider than the top, despite the "Center" option being checked. But it shows exactly what I'm going to get, which is a nice improvement over CS5.

In my early days working with the 7900 and its driver, I ranted here several times about the difficulty centering images on cut sheets. Look back at postings in late October through mid-November, 2011, for details. This new preview doesn't fix the centering problem (that is, checking the "Center" box in the Position frame of the dialog does NOT center the image on the sheet), but it does, finally, provide a good approximation of where on the sheet the image will be printed. This means the top margin can be adjusted so the image in the preview looks centered, and clipping of the image can be avoided. Nice!

Apparently, this is all Adobe's doing. As a test, I installed the latest 7900 driver on my MacBook Pro 15" laptop. This has OS X 10.8.2, but still has the older Photoshop CS5. The print dialog is exactly as it appeared on the Mac Pro with CS5 and the older OS, confirming the change is the result of the Photoshop upgrade to CS6.

  --Jay

Sunday, December 2, 2012

OS X 10.8 (Mountain Lion)

I generally don't rush in to things. I'm not an "early adopter", instead preferring to let others debug new products and software. They can be vendors' unpaid Quality Assurance if they want. After the flames have been put out and an update or two released to fix early problems, I'll have a look. I use my computer to make a living, so I suppose I'm cautious by nature.

Apple released the newest version of the Mac OS, "Mountain Lion", OS X version 10.8, several months ago. I had been using version 10.6.n since 2009; that is now two versions old. I was happy with that; it was stable, it was still receiving important updates (security patches, mostly, which, despite all the blather to the contrary, are needed on the Mac, too), and since I'd been using it for some time, it rarely presented any surprises.

Apple advertises support only for the current version of OS X, and one generation back, although they seem to be somewhat flexible with that "one generation" bit. In any case, when 10.8 was released in July (2012) I decided to upgrade. I've had a very busy year, especially spring and summer, so I'm only now getting around to installing Mountain Lion.

My Mac Pro has four bays for hard drives. I've long had three of those populated. For the new OS I installed a small HD, downloaded the OS from Apple, created a boot install drive, and then performed the installation. Quite straightforward, no issues worth mentioning. Of course, doing a clean install of an OS is the easy part, just the beginning of a somewhat longer process.

The first order of business was to upgrade my monitor profiling software, Coloreyes Display Pro, to the current version, which fixes a problem with the installer so it'll work properly with Mountain Lion. According to ICC, CED Pro 1.6 includes some minor feature enhancements and improves their LUT loader's interaction with DDC. I can attest this does seem to be the case. The software upgrade was USD $49.00.

I like to make bootable clones of the OS at intervals as I build up a new boot drive, just as a bit of insurance if something goes wrong installing or setting up new software. The version of Carbon Copy Cloner I've used for some time is not compatible with Mountain Lion. Another $45.00 hit on the checkbook fixed that.

I then downloaded the upgrade to Photoshop CS6 (from CS5). CS6 was released early this year; as I said, I'm not an early adopter! Another $200.00 spent. I was able to copy from my older boot drive most of the setting and preference files from CS5, making it simple to set up Photoshop, Bridge, and ACR in CS6 to have my familiar, customized workspaces. A few more software installations had my new, clean boot drive ready for prime time.

Among those, of course: the latest driver for the 7900. As mentioned in a posting here back in October, this is version 9.04, released in September. Installing new drivers over previous versions maintains the old version number; this is inconsistently exposed (see the October posting linked above) to the user. This is NOT the case with a clean install:


There's no ambiguity about which driver version is installed. I installed the driver, and then allowed Bonjour, Apple's device-finding technology (it's quite a lot more than that, in fact) to locate the printer and complete the setup. This took seconds. (I should mention that my printer is on our wired network).

So far I'm a happy camper, although I'm now about $300 poorer. To be fair, the Photoshop upgrade was not necessary, as CS5 is supposed to be fully compatible with Mountain Lion.

I haven't made a print in some time, so I've not yet used the new driver, nor PS CS6 to make a print. That'll change within the next week, as I've a couple of prints to make for a small commission. I don't expect any issues, but if the worst happens and I'm unable to print, I can simply boot from the old drive, with OS X 10.6.8 and PS CS5, to get the job done.

  --Jay

Friday, November 16, 2012

"Resetting—Please Wait..."

In more than one posting here I've mentioned a friend who has a 7900; Dean was a great help when I was doing my research prior to buying my printer last year. He recently posted updates to this on the Luminous Landscape forums. He's had his 7900 for four years.

I asked Dean if he'd installed the most recent firmware, released by Epson on 6 September, 2012 (on their U.S. site -- perhaps earlier or later elsewhere). That version is HN129C5. I asked only because I haven't seen here the problem he described, and I also have not yet updated my printer's firmware to this latest version.

He replied that he had not yet installed that update, which means we both have the same firmware. At least that eliminates the update from his troubleshooting routine. Dean said he planned to install it, but hadn't had time; it's something I'm sure he'll do soon.

I've just wrapped up the last of the client print jobs I've been working on, so now's not a bad time for me to install this update, too.

There are a few differences in our set-ups. Dean uses Windows 7, while I use a Mac Pro with OS X 10.6.8 (Snow Leopard). I'm setting up a hard drive now with Apple's current OS, 10.8.2 "Lion", but I'm not yet finished building that. It seems unlikely the OS or driver is part of the problem. Also, Dean's printer is directly connected to his computer via USB, while my printer is on my wired network. Again, the connection method seems an unlikely suspect.

  --Jay

Thursday, November 1, 2012

Head Strike

While working on a small print job I found I didn't have enough EEF in letter size, which is what the job required. I have plenty of EEF in 17 x 22 inch (U.S. C) sheets, however. Just cut one into four 8.5 x 11 inch sheets. Easy.

I did that, and noticed immediately upon making the cuts the edges of the pieces curled slightly. I didn't think much of it, and set to making the four prints as usual. To accommodate the print size without clipping (that is, without the 7900 cutting off part of the image) I had to feed the sheets sideways, that is, insert the wide edge into the printer. I've done this before; I have a custom paper size set up for that: 11 inches x 8.5 inches with 0 inch margins. It's a little tricky to drop the sheet into the printer and make certain it's straight, but as I said, I've done this before with these small sheets, so I had no trouble.

The first three of four prints were fine. The last one, however, emerged from the printer with a smear of ink on the trailing edge. The print itself was perfect. The ink smear was just inside the edge of the sheet. When I laid the sheet flat on a table, it was clear the offending edge had curled more than the previous three sheets. The smear was the result of the print head striking the paper; I heard it happen, a faint swish that wasn't part of the normal sounds of printing, on the last pass of the print head before the sheet was ejected.

Looking at all four prints, I could see the first three had caught up in the time that had elapsed since they were printed. The long cut edge of each had curled about the same as the fourth sheet.

Per my wife, who has some expertise in the paper production industry, it seems the newly exposed edges of the sheets I cut from the larger sheets picked up enough moisture to cause the curl. After the cuts, each sheet had one new long edge, and one new short edge. Only the long edge curled upward, toward (or into) the coated side; perhaps the direction of the paper fiber was a factor. Room humidity was in the high 40% range.

Head strike ink smear near the sheet's edge. Ouch!

I had two sheets left from a box of letter size sheets. These are perfectly flat. I reprinted the last photo on one of those. More of this paper is due to arrive today, along with the roll of Epson Hot Press Natural I mentioned in the previous posting.

The head strike happened two days ago. The print has not flattened on its own; it still has the curled edge. Why did the first three sheets print without incident and the four suffered the head strike? Time was certainly a factor. I started printing immediately after cutting the sheets, and the curl worsened in the 15 or so minutes between printing the first sheet and the last. In addition, I suspect I fed the first three sheets with the cut (curled) edge first. The leading edge would have been held flat enough against the platen by the rollers just above the print head. The last print was fed with the curled edge trailing. EEF is stiff enough that the curl would have "popped up" when the trailing edge exited the rollers above the print head. Another lesson learned.

  --Jay

Thursday, October 25, 2012

It's Been a Year!

I was surprised to discover I made my first print with the 7900 one year ago today. This blog was a year old yesterday. Thanks to all who have visited the blog and to those who have commented. Most have done that via direct email, so we're not seeing many comments attached to individual postings here.

According to the printer's log, I've printed 534 "pages". Not really a useful statistic. 146 of those pages were nozzle check prints. I suppose it's possible I've made nearly 400 real prints in the past year, but that seems a rather high number.

C, O, Y, LC, MK, PK, VM, and G are still the 90ml "starter" ink cartridges. Except for MK, which I seldom use for my own work, all have displayed "1%" for some time, and all have been temporarily replaced more than once to allow cleanings. LK was the first of the starter inks to be replaced. The original maintenance cartridge is at 36%.

My apologies for the lack of postings lately. I've been traveling, having spent time recently in Ohio and Michigan. Fall color was a bit dull in Ohio, but much nicer in west-central Michigan. I spent several days there photographing in the rain. A little uncomfortable now and then, but the wet conditions were often very nice for shooting fall color in the hardwood and pine forests.

I returned to find several new print jobs waiting for me, in addition to a small commission of my own work I'd lined up before leaving for the east. One of the new jobs is reproducing a large, 40-year-old etching. I'll be printing this on Epson Hot Press Natural, a mat-finished paper I've  been wanting to try for a while. Now that I think about it, I'd best get that paper ordered!

  --Jay

Saturday, October 6, 2012

Driver Update 9.04 (Macintosh)


On 6 September Epson posted to their US support site an update to the Mac driver for the 7900. This takes the driver from version 8.68 to 9.04. About this update, Epson says, "This file corrects a possible issue when printing borderless retain size." The release notes also indicate this update is for OS X 10.5 through 10.8. The download page includes installation instructions, pretty standard fare. There's no mention of a requirement to uninstall the previous driver, so I didn't. After installing the update and checking the version, I see this:


This is similar to what I saw after my update from 8.66 to 8.68. My original installation of the printer, back in October, 2011, was with the 8.65 driver.

Interestingly, when I open the Mac's Print & Fax preferences (control panel), click the Options & Supplies... button, the General tab of the resulting dialog still shows the driver version as 8.68.

I've no idea why. I made several prints yesterday and saw no differences in the driver's options or set-up choices. One would expect a full point (from 8.something to 9.something) to have some enhancements or new features rather that only bug-fixes. Of course, Epson does things its own way, and not with any great consistency.

There's one more place, as far as I know, where OS X exposes the driver version. That's in the Printers sheet under Hardware, in the System Profiler. The driver is shown there as 8.6.8.

I've built a Mountain Lion (OS X 10.8) drive for my Mac Pro. When time permits (not real soon, alas) I'll install the new driver on that system. Since it won't be an update installed over an older version. I'd expect the version number to appear correctly in all places. TBD.

  --Jay

Thursday, October 4, 2012

Anatomy of a 7900/9900 Ink Cartridge

If you've never wondered what's inside an ink cartridge (besides ink), that's probably because you have a normal brain and worthwhile things to do with your life. I, on the other hand.... Sometimes it's useful to know how or why things work. Sometimes not. Either way, it's often interesting. I can't resist taking things apart.

What follows is a series of photos of the parts inside my spent, 90ml "starter" cartridge of light magenta ink. While I have some hunches about the purpose of the various pieces, I've no direct knowledge from Epson. Best I can do is guess what some of these things do.

This view shows the cartridge after I snapped off the cover. The front "handle" end of the cartridge is at the bottom of the picture. There's a transparent film seal (which I removed before taking this picture) covering the compartment housing the ink bladder (the silver bag with the bar code). That seal allows the cartridge to be pressurized by the printer through the nipple at the bottom-rear of the cartridge. I replaced this cartridge when the 7900 stopped printing and required a new one. It's clear the machine squeezed every last bit of ink from the bag. It's completely flat, with no pockets of wasted ink. Nice!


The rear of the cartridge. The CSIC chip (Customer-Specified Integrated Circuit, a micro-controller made to Epson's specifications) is at the top. Below that is a component with a small ink reservoir, the valve through which ink exits the cartridge, and a pair of conductors that make contact with pads on the underside of the CSIC chip. The nine gold pads on top of the CSIC chip communicate cartridge status to the printer.

 This complex gadget includes a small reservoir through which ink flows from the bag to the exit valve that mates with the nipples in the back of the printer's ink bays. The nipple at far left fits into the ink bag in the cartridge.

There's a chip, or perhaps a piezo element, between the two metal tabs behind the small reservoir. My guess is that this either counts pulses from the small, spring-loaded "paddle" that covers the reservoir (not shown), or directly measures or senses the presence of ink in the reservoir. In any case, the count or sensed input is communicated via the metal tabs to the CSIC chip shown in the next image.

The CSIC chip, showing the chip-on-board construction. The two gold pads, showing slight wear marks in their centers, make contact with the metal conductors running to the top of the part in the previous two pictures. This board has nine gold pads on the opposite side. I assume there are matching contacts for at least some of those pads in the printer's ink bays, so information from the chip can be communicated to the printer.
That's the best I can do with my technical guess-work. Perhaps someone more knowledgeable can chime in with descriptions of what these parts really do, and perhaps provide proper names for the various components.

Clearly, when one buys a cartridge (currently I'm paying about $85 for 150ml carts) one is getting much more than ink.

  --Jay


Tuesday, September 25, 2012

Description of New Firmware, Print Job Backlog

While I was away last week I received an email from Josef Lamber with this description of the changes in the new 7900 firmware:
Versions: 
Printer: HN129C5 Network: 2.11 SpectroProofer: AC3085 
Improvements: 
Add new Paper Feed Adjust feature, Add new Standard color calibration feature, Improve the productivity of photo roll paper printing, Improvement of the amount of suction fan for plain paper, Improvement of printing from multiple client at the same time.
I couldn't read most of his comments (in German); I assume this came from a German (or European) Epson support page. Thanks very much, Josef!

Photo being printed © Judith Bromley
Since I've returned from my trip to very smoky (thanks to three large wildfires more or less surrounding the parks) Yellowstone and Grand Teton National Parks I've been quite busy getting out client print jobs that have stacked up. I'm making my way toward the end of the backlog. Since my printer is working well (as is the Mac driver, apparently), I won't install the updates until I wrap up these print jobs.

One of the jobs I printed today included a panoramic image 42 inches (107 cm) long, but only 5 inches (13 cm) high. I expected this to be an odd-looking photograph, but in fact it's very cool, capturing lots of detail across a very wide sweep of the landscape above western Montana's Flathead Lake, where both the photographer and I live.

The narrowest roll paper I have is 17 inches. Printing that pano would have wasted a great deal of paper, but fortunately the same photographer wanted a couple of additional photos printed. As it turned out I could "nest" those together in a new Photoshop file and print them as a single item to be cut apart after a suitable drying period. Very little paper (GGFS) was wasted.

It's a little hard to see in the small photo here. The pano is along the left side of the paper, and is not yet completely printed. The two larger images are "abstractions" of a pair of horses.

  --Jay

Thursday, September 13, 2012

Firmware and Driver Updates

A couple of days ago I noticed updates to both the 7900's firmware, and to the Mac drivers, had been posted to Epson's U.S. support site. I've been busy with other work, and will be leaving tomorrow to spend a few days camping and photographing in Yellowstone and Grand Teton National Parks. It'll likely be a little while before I get either of these updates installed.

Epson provides a very brief comment about the 9.04 Mac driver update:

Printer Driver v9.04 
09/06/12 66.8 MB

Description: This file contains the Epson Stylus Pro 7900 and 9900 Printer Driver v9.04.

This file corrects a possible issue when printing borderless retain size. 

However, there's no comment at all about the HN129C5 firmware update. I've no idea what it changes or fixes. Sometimes Epson's support sites for other countries offers more information. When I have time I'll give those a look, and see what pops up on various forums.

  --Jay

Large Prints, Soft Paper

I recently received an order from a Michigan client who shoots only wide panoramic pictures. Seems he has an opportunity to display some pieces in a swanky local restaurant, and they wanted the images printed large.

I'd seen and printed two of the ten pictures before. The client wanted several in this new batch printed 48 inches (122 cm) wide. In the past I'd printed his work on the Canon HW Satin. I printed this new order on Epson's Luster. The surface is very similar to the Canon in texture and tone. The paper is slightly lighter in weight, and very "soft", that is, a very flexible paper that lays almost perfectly flat when it comes off the roll.

Photo being printed © Steve Ross
The printing was completely routine. I encountered no problems with the printer or the paper. In between two of the prints I received a "replace ink" message on the printer's LCD, which showed the VM cartridge as empty. This was one of the 90ml "starter" cartridges; it's been showing 1% for a long time. No surprise it had to be changed. I have several others in that same 1% state. I expect the 7900 to require changing them every time I print. Apparently one gets very good mileage from that last 1%.

One thing I learned while doing this job: large prints are a challenge to handle. After the printer cuts a 24 inch wide by 53 inch long sheet from the roll, one must be very careful to pick up the print and move it to a table without kinking or dimpling the paper. I suspect this is especially true of very soft papers like the luster. I've printed this large on Moab Entrada Natural 300gsm, an extraordinarily stiff paper. The stuff is like aluminum flashing; it fights hard to maintain its curl. I had no trouble handling those prints. The luster's a very different animal.

I've cautioned the client to minimize handling, and to be very careful with the prints. He's not known for doing anything carefully; I won't be surprised to hear one or more is damaged as he gets his first look at them, or transports them to his framer.

  --Jay

Monday, September 10, 2012

How Not to Ship Stuff

I live in a rural area, about half-way between Kalispell and Missoula, Montana. Although I go to one or the other of those "big cities" a couple of times each  month, neither offers much in the way of retail photographic stores, and nothing at all that caters to large-format printing needs. I've no choice but to order paper, ink, and other supplies via the Web. Doing that, of course, means the products are shipped to my door. That brings the risk of receiving damaged goods, and that is becoming a too-frequent occurrence.

This is due in part to the brutal handing of packages by the good folk at UPS and FedEx. Unfortunately, the product vendors do nothing to help insure safe delivery. An example:

A badly damaged carton from Atlex, delivered by UPSA few days ago I ordered, from Atlex, a 25-sheet box of EEF, 17 x 22 inches (US C). This arrived Friday while I was away.

At left is what I found this on the front porch. You can't see it in this photo, but the tape on the "top" of the carton, the side against the house, was completely broken open. The top of the carton was held closed by the adhesive-backed plastic sleeve holding the packing slip. The bottom of the carton was pushed half-way into the box's interior. Expecting the worst, I photographed the carton before opening it.

Inside the carton, showing the lack of packing materialInside I found only the box of EEF. No packing material. None. No styrofoam peanuts. No bubble-wrap or air pillows. No crumpled craft paper. The Epson box is about two inches (5 cm) narrower than the shipping carton. The Epson box is a little over one inch (2.5 cm) thick, while the shipping carton is six inches (15 cm) deep. Plenty of room for the Epson box to bash around inside the larger carton, which it apparently did with abandon. You can see here the edges of the EEF box are scuffed. These boxes are taped on two edges. One of those tape seals had broken.

When I opened the Epson box I found the inner supports, designed to cushion the pack of paper and keep it centered in the box, were smashed flat. The pack of paper had slipped over-top of the support on one side of the box. Nothing good could come from that.
The damage inside the Epson box

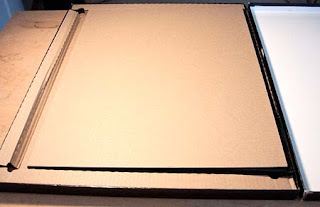
This picture shows the paper pack and its cardboard cover pushed against the right-hand side of the box, and shows the crushed support on the left. The support on the right, under the paper pack, was similarly flattened.

I opened the black plastic sleeve holding the paper and removed the top sheet. I found one deep and one shallow crease in the paper. This doesn't show well in the photo. Clearly this is unusable. I didn't pull any additional sheets from the pack. I returned that to the sleeve and closed the box.

Time to call Atlex.

  --Jay

Update: I had a two-minute conversation with Matt at Atlex. Replacement paper will ship today. A return label for the damaged shipment will be sent via email. I feel like I've spun the roulette wheel—no idea if the replacement will be any better than the first shipment. Time will tell.

Wednesday, September 5, 2012

Ink Swap Nightmare

Yesterday I did a client print job that included 19 prints, all on EEF (a gloss paper, requiring PK ink). Four were on 17 x 22 inch sheets (US C). One was on a 13 x 19 inch sheet (Super A3/B). The remaining 14 were on (US) letter-size sheets. There were no problems with the printing; the 7900 performed flawlessly, as it nearly always does.

However, the preparation for this print job was the most frustrating experience I've had with my printer so far. Here's the story:

I'd done some print jobs last week on matte papers. Prior to starting yesterday's job I had to swap MK for PK. Not a problem. Press the button, the machine swaps the inks. I've learned this process will automatically perform a cleaning when the next print job is sent. I made that next print job a nozzle check print, which I initiated from the printer's control panel.

I immediately got the set of messages I showed and described in my previous posting. One of the ink levels was too low for cleaning. I needed to replace that ink before cleaning could continue. But which ink? The printer doesn't tell you.

Perhaps my problem is partly my own fault. There are 11 inks in this printer. Eight of those 11 in my printer are at 4% or lower. But I've made dozens of prints with ink levels at 1%, and see no reason to replace inks if the machine will continue to print with them. It may be necessary to replace an ink cartridge for cleaning, but Epson makes it quite clear that, once the cleaning is finished, the nearly empty cartridge can be re-installed and used until it's empty. That's what I do.

I've heard, and seen some evidence myself, that if an ink is at 5% or below, the 7900 will require installing a new (or at least, more full than 5%) cartridge before cleaning can continue. In any case, I had no idea which ink to change. Since I'd just done the MK-to-PK swap, I guessed I needed to replace my PK, which was at 4%. I installed a new PK. Replacing an ink cartridge requires pressing a button, choosing from a menu whether to open the left, right, or both ink compartment doors, replacing the ink cartridge, closing the door, and then waiting a minute for the system to pressurize. After all that for the PK replacement, the printer displayed the "Ink too low to clean" message again.

Which ink to change? I made a guess, replaced that ink, and again the machine displayed its "Ink too low to clean" message. To shorten the story, one at a time I replaced a total of seven ink cartridges before the machine would proceed with the cleaning. Fortunately I had a complete set of inks on hand.

When the cleaning finished, I removed all the new inks, returned the low-level cartridges to the machine, and then began printing. I was able to complete the job, and run several more prints today, without issue.

Epson: please, please give us a firmware update that identifies the ink(s) that must be replaced for cleanings! The current process is intolerable.

  --Jay

Thursday, August 30, 2012

Less Than Helpful Messages

I recently printed a series of client photos on EEF, and then printed several of my own pieces on Luster, to fill orders taken during a recent show. With those out of the way I decided to swap PK for MK so I could print another client job I've put off for while I was busy preparing my current show. That print would be made on Epson Enhanced Matte paper.

The printer performed the ink swap as usual. Also as usual, it wanted to do a cleaning when I sent the first print job after the swap. The machine stopped, showing this pair of messages on the LCD (the display toggles between them).

OK, which ink did you have in mind? Of the eleven inks in my 7900, all but three are below 5%, which I've come to believe is the threshold for cleaning. If an ink level is at 5% or lower, the machine won't run its cleaning routine until a new ink cartridge is installed. Once the cleaning is finished, that cartridge can be removed and the original cartridge can be installed so its ink can be more completely consumed during routine printing.

But the display does not indicate which ink(s) are too low. Since I have eight inks below 5%, I'd no idea which to replace for the cleaning. I'd done a black swap, so I guessed the printer might be unhappy about the PK being at 3%, even though PK was no longer being used after the swap. I installed a new PK, but the messages remained the same.

I had one channel, VM, which had a tiny gap in the nozzle check pattern last time I printed one. So I canceled the current operation, installed a new C and a new VM, and then ran a cleaning cycle on the C/VM pair. Another nozzle check print showed the VM was now perfect. I returned my low C and VM to the machine and was able to make my print without further interruption.

Epson, how hard would it be to make these messages a bit more helpful? Any reason the message couldn't specify which ink is too low? If there's more than one, couldn't the display toggle through a list of them?

As it is, one must either know beforehand which ink is likely to raise a complaint, or guess well, or replace several inks before happening on the right one(s). Dumb.

  --Jay

Thursday, August 23, 2012

Epson Rebate; Perseverance Pays Off!

Installment #8 in the on-going Epson Rebate Debacle: Imagine my surprise when, as I was loading my car with pictures to hang later today in a "one-man" show, FedEx appeared in my driveway with this.

As you can see, the carton is a little banged up. As you can't see, one end (under the Epson label) is nearly torn off. The carton isn't made of especially hefty cardboard, and there's no internal protection for the roll of paper other than a plastic bag and molded plastic end caps. Epson does a much better job packaging it's professional cut-sheet papers. But the roll appears to be undamaged. The timing of this is excellent (if you don't count the months it's taken to get it), as I have a client arriving later today with a scan of a 4x5 negative. She wants a couple of large prints. She's got strong feelings about paper (as she should, and as do I); I suspect she'll want this or GGFS for her prints.

It's been nearly ten months since I submitted the original paperwork to claim this rebate, but I think I can call this the end of the Epson Rebate Follies!

  --Jay

Monday, August 20, 2012

VM "Clog" Goes Away By Itself

In my last posting I mentioned the nozzle-check print showed a tiny gap in VM, and that I'd ignored this and printed anyway. I had other problems when printing, but none related to the few missing VM nozzles. I had to clean (twice) a nozzle pair that did not include VM; when those nozzles were back to 100% I still had the tiny gap in VM. Not a surprise.

Today I made a print on a 24 inch roll of Luster. As usual, I started the job by printing a nozzle check. Interestingly, the tiny gap in VM was gone. There were no missing nozzles. I hadn't cleaned the pair that includes VM.

The provides additional evidence, corroborating that reported on various printing forums, that not all nozzle clogs are clogs. Gaps in nozzle check patterns may be caused by ink being "pulled back" away from the nozzles under some circumstances. Speculation, of course, given the absence of any verifiable information from Epson.

In any case, nozzle clogs aren't always clogs, but perhaps should be called "ink delivery problems", since we often don't know their causes.

Today my nozzle check was perfect, as was the print that followed it.

  --Jay

Friday, August 17, 2012

Can't Trust the Nozzle Check Print?

Over the course of the last four weeks, in preparing for a series of shows I've made dozens of prints. Many have been small, printed several across on 24 inch Luster. I've also printed a few panoramas on various papers, and a number of prints on 13x19 and 17x22 inch sheets. The 7900 has performed flawlessly. I don't post much here when there's nothing to say; the printer's given me little to talk about in recent weeks. That's always a Good Thing.

I've put aside a number of client print jobs (for my more tolerant clients). I'll be getting to those after my next exhibit hanging and opening reception, that reception being 26 August. It's a large show; as the featured artist I've got most of the gallery to fill. In addition to selecting the work to print, which takes more time than you might think if you've not been down that road, I've been working like a mad person to wrap up the printing, matting, and framing. Fortunately, most of that's now behind me. A few last minute details to sort out, hang the show this coming Thursday, and then enjoy the opening the following Sunday.

As usual, I begin each day's printing by printing a nozzle check on plain bond paper. These have been perfect for weeks, despite varying temperatures and humidities in my print studio. Today, however, I had a very odd occurrence.

I'd made a couple of prints two days ago, with no problems. Today I printed a nozzle check; it showed a very tiny gap in the pattern for VM. I decided to print anyway, loaded a sheet of GGFS, and sent the print job. The result was terrible. Washed out colors, the print looking badly blown out and horribly over-sharpened. I checked my setup, verified the use of the correct profile, even made sure I'd fed the sheet with the correct side "up". Everything looked fine.

Lacking any better ideas I printed another nozzle check. The LLK channel was missing completely. The pattern for LLK was perfect on the first nozzle check print, run not ten minutes earlier, immediately before making the failed print. I've no idea what happened to that channel, but clearly there was an ink delivery problem.

I ran a pair cleaning of LLK/Y, and then made another nozzle check print. This showed a few of the LLK nozzles had returned, but most of the pattern was still missing. I then ran a "powerful" cleaning of the same pair, and another nozzle check print. This time the pattern was perfect.

I fed another sheet of GGFS, ran my print, and got the result I expected the first time—a perfect print.

This disappearing nozzle problem hasn't happened to me before, but I've read a number of reports of this on various forums. It's a darned unhandy way to waste a sheet of quality (expensive) paper.

  --Jay

Wednesday, August 15, 2012

Epson Rebate Follies, Part 7

I've avoided writing about this simply because nothing's happening, despite my best efforts. If you've not been following along, I am owed a 24 inch roll of Epson Exhibition Fiber paper, from a rebate offer included with the purchase of my printer last October. In my last posting on the rebate subject I described a call I received from the rebate fulfillment house. A couple of weeks later, as I was leaving my driveway for an appointment, a FedEx truck pulled in. Assuming this was a delivery, I continued on my way. When I returned home there was no package waiting. Hmmmm....

The next morning the same driver arrived in his FedEx truck. The driver asked if I had a pick-up. Huh? I didn't call for any pick up. The driver produced a label from Archway, the company that bungles Epson's rebates. Understanding now what was happening, I handed over the package of Exhibition Canvas I'd received in error looooong ago, collected my receipt, and Mr. FedEx drove away.

If it's not obvious, I had no prior warning this label was coming. Are these people great communifucators, or what?

Since that telephone call from Epson/Archway back in July, there'd been no phone calls or other correspondence. Today I rattled the cage, sending a request for the status of my rebate. I mentioned I'd handed over the only thing I'd ever received from the to a FedEx driver, and was then left with nothing.

The response:

Dear Jay Cross,
Thank You for your patience it is greatly appreciated.  
Per the Special Handling Department you were correctly sent the call tag to return the incorrect product.  We are so sorry that was not explained to you in detail before hand as you stated.   Your correct order is currently in processing as of 07/28/2012.  Please allow more time for delivery.
Again we are sorry for the inconvenience.

Sincerely, Erika Epson Customer Care1-800-277-6187
Apparently I'm not patient enough. They need more time. A lot can happen in nine months. It would seem shipping  roll of paper isn't among them. It would also seem we started fresh on 28 July. I'll keep you posted.

  --Jay

Friday, August 3, 2012

Printing Multiples (n-up on a sheet)

Today and this weekend I'll be printing the last of the new pieces for the one outdoor show in which I exhibit. The show is Saturday, 11 August, on the courthouse lawn in Polson, MT. None of my half-dozen readers is local, but if by chance you've stumbled across this posting and you'll be in the area, please stop and say 'Hello'.

The 7900 has been idle a couple of weeks. As I mentioned in an earlier posting here, I made a number of prints on mat (matte) paper for a client in mid-July. Since then I swapped MK for PK, printed a profile test image on Epson Luster ("Epson Premium Luster Photo Paper 260"), and then made a larger print on the same paper. While this paper isn't as heavy or thick as my previous favorite satin (Canon HW Satin 300 gsm), I think the Luster will make a fine replacement for the Canon-branded satin, which apparently has been discontinued in 24 inch rolls. The Luster is 260 gsm and clearly a bit thinner, but it comes off the roll quite flat, no de-curling necessary.

Today I had to print a small panorama for a client. At a bit over 28 inches (71 cm) long, the image is only 10 inches (25 cm) high. So as not to waste paper on the 24 inch roll, I printed a couple of new images along side the panorama. QImage is a highly-regarded and recommended application for, among other printing tasks, setting up a page for multiple images. QImage is a Windows-only program, making it irrelevant for me as a Mac user. Instead, when I want to print n-up images on a sheet or roll, I create a new Photoshop file sized appropriately, copy my individual files, and paste them as layers into that new document. Using rulers and guides I position the layers as desired, and then print.

The pictures I printed today are shown at left. I started by running a nozzle-check print as usual, and found no problems, a nice surprise after the printer's longer-than-usual idle period. Normally I'd print the two smaller images together on a single 13x19 inch sheet and then cut them apart. I make a lot of prints that size, as they are clearly larger than can be printed with the typical "kitchen table" color inkjet printer, but are still small enough to sell fairly cheaply.

To save a little time I've created a few template files for Photoshop, with guides positioned to make pasting in the images quick and easy. This is most useful for the couple of "standard" sizes I print frequently. I'll be doing more of this kind of print in the next couple of days, and then jump into a marathon framing session next week after the prints have dried for a couple of days.

Next up will be switching back to MK for a small client job that came in just minutes after I'd switched from MK to PK. I try to be smart about making the switch, queuing up a number of jobs for either MK or PK before making the switch. But client jobs come in on their own schedule, requiring the switch as needed. Fortunately, the 7900 seems pretty frugal with ink when making the switch.

  --Jay

Monday, July 23, 2012

Epson Calls!

The phone rings and, and because I'm out in my garage where there's no phone, the answering machine picks up before I can get to a handset. As I walk through the doorway I hear the voice leaving its message; I hear "Epson" and "rebate", so I run a little more quickly to the phone. I pick up and ask the voice to please start over.

It's Teresa, who happens to have a stunningly beautiful, mesmerizing voice. After explaining who she is, she asks about the paper I'd received (in error). If you've missed the background on this, my last posting describes yet another email I sent requesting the status of the rebate, to which I received this reply, which sounds very much like the many other responses I've had during this months-long saga:

Dear Jay Cross 
 
Thank You for your email concerning your rebate.   We are sorry for the  inconvenience.  We resubmitted your submission to Special Handling Team for processing. Please allow 3-5 weeks delivery of your rebate.
 
If you have any additional questions contact us at 1-800-277-6187 Monday-Friday 8 AM - 8 PM EST.
 
Sincerely,
 
Laroylyn
Epson Rebate Center

Three to five weeks. Again. This posting provides links to the entire history, in case you're fascinated by customer service train wrecks and want all the details going back to November, 2011.

Back to the silky-voiced Teresa: She asked if the roll of paper I received was Exhibition Fibre, or Matte. I explained it was neither; it was a roll of Exhibition Canvas, which is not what I wanted, nor what I requested. With that cleared up (again), Teresa promised they'd get this right, and a roll of Exhibition Fibre paper would be shipped. She didn't say when. She said their best guess as to what happened is that the papers were mixed up in their warehouse. Sounds simple enough, and I'd buy that explanation if I didn't have a pretty thorough understanding of production and inventory control (P&IC), how warehouses use "stock locates" so human or robotic stock pickers can put new inventory where it belongs so it can be found again later for order fulfillment, etc. In any case, I was delighted to receive the call, knowing it was initiated by Epson as a response to my nagging. I was also glad for the opportunity to listen to Teresa for a couple of minutes.

Stay tuned....

  --Jay

Thursday, July 19, 2012

Matte Paper Print Jobs

A few days ago I made a baker's dozen prints on a Epson-branded matte paper. These were printed on letter size sheets. The prints will go into 11 x 14 inch mats, then into clear bags. These sell quite well, perhaps because I select images of local landscapes (including Glacier and Yellowstone National Parks) and the kinds of charismatic wildlife people see there, or hope to see there. I also display a lot of bird photos this way.

I didn't buy the 7900 to make small prints, but it's a necessary part of my business.

As luck would have it, while set up with MK loaded, I got a call from a client for whom I've printed before. She wanted a large number of prints on her preferred paper, Epson Enhanced Matte. I print most of these from a 17 inch roll.

Her jobs are the easiest work I do. She had several of her watercolor paintings scanned by a service that's no longer in business. The scans are prefect. I only need open the Photoshop files and print, and then package the lot  for delivery. Since the client is local, I deliver the work, so there are no shipping costs. As friend Dean has said, this is like printing money.

When the printer cut the job's last print from the roll, the ink status on the LCD showed the LK ink with a red X, along with a message indicating the ink must be replaced. I replaced that original, 90ml LK with a 150ml cartridge I've had on-hand for a while. I've installed that LK temporarily several times for cleanings.

Also at the end of that print job I found my G and LC inks at 2%. That's adequate for many more prints, but the machine will not clean either of those channels with only 2%. I ordered both, and received the G today. The expiration date is 5/2013.

I've got a new 24 inch roll of Epson Luster, on which I want to make a few prints for an outdoor show coming up in August. I have not used this paper before. I'll be switching from MK to PK soon, and printing a profile evaluation image.

Last comment for today: the weather here in western Montana has been strange. It's been quite humid, and we've had much more rain than normal (whatever "normal" is these days) for this time of year. Relative humidity percentages have been in the sixties, even the seventies, in the mornings. But the printer has shown no more clogs than I've seen when the RH has been much lower. It appears humidity isn't affecting the machine in any obvious way. I'll continue to record the room temperature and RH on each nozzle print, so I'll have the data if the clog situation changes.

  --Jay

Saturday, July 14, 2012

5000°K Lighting

OTA*

In earlier postings I've mentioned building a print studio in my home that would include a viewing booth of sorts. This consists of a steel panel on which I can hang prints using small magnets, and 5000 degree Kelvin lights in an overhead track.

I hung the steel panel some time ago; it's working out nicely. I ordered LED bulbs with a GU10 base (MR16 base dimensions, but with larger, "nail-head" like pins). These are 5000°K bulbs made by Lighting Science, ordered from 1000bulbs.com in April, for a bit more than $30 each (including the shipping cost). The day after placing the order I received an email from my rep there, saying these bulbs were not in stock and not expected until June. She said they had no equivalent 5000°K bulbs. I decided to wait. These bulbs are exactly what I wanted, and I had already purchased the fixtures for my lighting track, so I needed the GU10 base.

In the second half of June I wrote the rep at 1000bulbs.com, asking for the status of my order. She said they'd not received these bulbs from Lighting Science, and the company could not provide a shipping date, perhaps indicating a manufacturing problem. She offered to send a different bulb from the same manufacturer, but with a narrower lighting pattern. That wouldn't work in my application. I canceled the order and started the search for another source.

As it turned out, 5000°K, GU10-base, LED floods aren't easy to find!

Eventually I found them on the site of a Chinese distributor. These were not made by Lighting Science, but had the right specifications and were, in fact, slightly brighter, a good thing. I'd never heard of the vendor, "Light In The Box, Ltd.", through their miniinthebox.com site. I was a little skeptical because the price was amazingly low and the vendor paid the shipping cost. But for $6.00 each, the risk was low, so on 18 June I ordered three.


One of the completed fixtures

Two days ago an envelope appeared in my mailbox. The package was in terrible condition, dirty, torn, and flattened. The shipping label included import/customs information along with a block of Chinese characters. Inside were my three LED bulbs, intact and working.

Size comparison: LED bulb vs. standard MR16/GU10
The LED bulb (rear) is slightly longer than
the standard MR16/GU10


These bulbs are about a quarter inch (.6cm) longer than the standard GU10/MR16 lamp. My track fixtures are small, designed for the form-factor of the normal GU10. I had to modify the fixtures slightly so the LED bulbs would fit. A trivial bit of machine work did the job. The bulb extends slightly through the front bezel of the fixture. I think it looks good.

As you'd expect, the lighting on my magnetic board now seems quite blue compared to the normal halogen lighting in the room. If I photograph directly into one of these bulbs, the camera data show the white balance/color temp at 5100°. That's the best I can do to measure the output of the bulbs. In any case, they're certainly better than the typical warm halogen or florescent lighting.

--Jay

*Off-topic Alert: This posting isn't directly related to life with a 7900. It is, however relevant to my printing efforts.

Wednesday, July 11, 2012

Something a Little Different

Immediately upon returning from several days camping in the rain at Glacier National Park I delivered a  batch of pictures to a local gallery for an all-photography show that opens Friday. If you're near Polson, Montana Friday, 13 July, stop in to the Sandpiper Art Gallery on Main Street. The opening reception is from 5:00—7:00. I'm one of four photographers featured in the show. I helped hang the show a couple of days ago. There's a quite a mixture of subjects and styles, making it a very interesting show. The show will remain in the gallery through 17 August.

For my shows I display a very brief biography and "artist's statement" in a small frame. I'd not updated that in a while. Last time I did I printed it with an ancient HP Photosmart printer, one we used only occasionally for business graphics and other letter-size color prints. I recycled that printer a few weeks ago, leaving the 7900 as the only color printer in the house.

This screen capture isn't readable, but you can see there are several
paragraphs of text, a photo, and a signature .gif, all of which look
good on Enhanced Matte.
I created this document with LibreOffice Writer, and included a photo snapped by my bother-in-law in Badlands National Park; it's the same photo used here on my profile page. I'd never printed to the 7900 from Writer, and I'd never printed a file with text on the 7900. Because there's nothing critical about the appearance of the document, I printed with the driver's  color matching option set to "Epson Color Controls", which is called "printer manages color" in Photoshop. I made the print on a letter-size sheet of Epson Enhanced Matte paper (Ultra Premium Presentation Paper).

The only puzzle I encountered was setting the sheet size. Writer has a Page... option under its Format menu. One sets the page size there; my default is 8.5 x 11 inches (letter size). That option does not set the page (sheet) size when printing. I spent several minutes looking for the page size in the printer dialog. To access this with the Mac driver, it's necessary to check the "Scale to fit paper size" checkbox on the Paper Handling tab. This enables the Destination Paper Size drop-down list from which all of the paper sizes one normally finds for the 7900 can be accessed. Mystery solved.

The resulting print is fine. The text quality is quite good, although less crisp than text printed by my HP LaserJet  1200. The photo looks fine, too, more than adequate for this purpose.

  --Jay

Friday, June 29, 2012

New Ink

I've finally wrapped up the printing I needed to get done for an upcoming show. I'm leaving tomorrow for a few days of camping and photography in Glacier; I'll deliver the work to the gallery the day after I return from the park. As usual, I was in a rush to get everything printed, sufficiently dry for matting and framing, labeled, and priced. With that behind me I can enjoy the park, if not the expected crowds.

I made the last several prints on a mat (matte) paper, as mentioned in my previous posting. I'd made two prints, had set up the file for the next one, and walked to the printer to insert the sheet of paper. The LCD displayed a message, "Replace Ink", which I'd not seen before. This is the no-nonsense, "can't go any further until you replace ink" message. The display indicated the LLK must be replaced. This ink has been showing 1% for a very long time, so it was hardly a surprise that it was finally empty.

I replaced the LLK "starter" cartridge with a new, 150ml cart. This is the first of the 90ml carts to be discarded and replaced. The LCD ink status display now shows one ink (#10) at full capacity. I have several others that have been at 1% for some time. 150ml carts are on-hand for those.

Update: earlier this month I posted here about printing black and white. Since then I've thought about this a bit more. Yesterday I posted a new article on my site about shooting, but not printing much black and white.

  --Jay

Monday, June 25, 2012

The Humidity Factor

I've got a show to hang in a couple of weeks. Between now and then I'll be camping in Glacier National Park for a few days. I have the rest of this week to make any additional prints I'll want for the show. I'll finish the framing when I get back from the park. Most of the printing is done, except for a few I want to print on mat papers. Yesterday I switched from PK to MK, and just like the last time I did this, the printer did not run a cleaning cycle after the ink swap. When the switch completed I ran a nozzle check print and found no problems.

A panorama of an image from Freezeout Lake, along the
Rocky Mountain Front. This is printing on Moab Entrada
Natural. The finished print is 39 inches (1m) long. You can
see the photo here (it's the first image on the page).
There's been much debate in the usual forums about the affect of humidity on these machines. Some say they see more nozzle clogs (I prefer to think of these as "ink delivery problems", in which I'd include clogs, but also other reasons for missing nozzles in the check prints) when humidity is high, while seeing their problems diminish in lower humidities. Others report exactly the opposite; for them high humidity means fewer clogs. "High" and "low" aren't clearly defined in these discussions. The debate continues, but without more than anecdotal evidence one can only conclude that humidity may play a role. It seems there are more reports of issues with higher, rather than lower humidity.

Here in western Montana, we get most of our rain in May and June. That's been true for this year; in fact we've had record rain amounts all around us, and I've been seeing decent levels in my rain gauge lately. As you'd expect, this means humidity levels, which are typically quite low and drop lower during summer, have been higher that usual. When I printed my nozzle check yesterday, my low-cost digital hygrometer showed 63%RH, a full 20 points higher than I've seen in the room nearly the entire time I've owned the 7900. The nozzle check print was fine, and the dozen prints I ran afterward (MK ink on mat papers) were also fine.

Our rainy season will pass as it always has, it'll get hot, and very dry (our rainy season gives way to wildfire season). I record the room temperature and humidity on each nozzle check print, so I'll continue to watch this, and perhaps determine, at least in my own printing setup, the impact of humidity.

  --Jay

Thursday, June 14, 2012

Ink Update

After a long period of chilly and wet weather, conditions here have finally begun to swing toward summer; I've been very busy with outdoor chores and other good-weather responsibilities, and have done no printing in recent days. I have, however, squeezed in a little time to be out photographing locally. My last print job for a client was a week ago. Except for dealing with a stubborn clog in the VM channel, which required a "powerful" cleaning to clear, it was completely routine.

Today I received a large (for me) order of frames and mats from Documounts. I returned home from an errand to find a sixty pound (27kg) box on my front porch. Along with inventory already on hand, this should cover most of what I'll need for my summer shows. I'll be making a number of prints in coming weeks to fill those frames. Any additional framing I might need will be done by a local framer who's done a wonderful job in the past on some of my largest panoramas.

Update to my previous (8 June) posting: Yesterday I received the promised replacement Y ink from IT Supplies. The expiration date is March, 2014. I have not received the promised return shipping label for the Y ink they sent earlier, that being the one that expires in about two weeks.

  --Jay

Friday, June 8, 2012

Old New Ink

Sunday (3 June) I ordered Yellow and Vivid Light Magenta inks from my usual vendor, IT Supplies. Yesterday I received the ink. The logistics of these things always fascinate me. The Y shipped from Minnesota, in a "Jiffylite"® bag. The VLM shipped in a cardboard box from California. Both shipped via UPS, and arrived together, same day, same front porch in western Montana. Amazing.

I opened the box, and found a large Epson carton with the VLM. This carton is larger than, and physically quite different in form from the previous four inks I've received. The expiration date on the VLM is January, 2014.

The new VLM (center), the new Y (right), and the LLK I've had on-hand for a few
months. The package for the oldest of the lot, the Y, is a tight fit to the cartridge. The
other cartons are much larger. The VLM carton is heavy corrugated cardboard, while the
others are thin fiberboard.
I opened the bag, and found a very small Epson carton with the Y cartridge. This carton is very thin fiberboard, and smaller than the other inks I have on hand. Epson's clearly found reason to tinker with their packaging design. The expiration date on the Y is July, 2012. We're about three weeks from its expiration date, making it useless to me. It's all but certain I wouldn't install this ink in the printer before the expiration date.

This morning I called IT Supplies. I spoke with Chris for about 30 seconds. He promised to get a new Y on the way, one with a more typical (18 months, more or less) expiration date, and to email a return label for the "old" Y.

I've used IT Supplies for ink and paper as long as I've been printing because they have good prices, nice people to deal with, and almost always ship quickly. Orders greater that USD $100 ship free; it's always too easy to exceed $100 when ordering. I've had a couple of problems before with shipments from them, usually the result of horrible packaging. In those cases I assumed they had a new kid working in the shipping department, a kid with no common sense, and they didn't train him very well or make him put away his cell phone. But IT Supplies has always handled any problem quickly, and with minimum hassle for me.

They should never have sent the old ink. Fortunately, I don't need it today, and they are taking care of the problem.

I'm happy the VLM is a keeper. The "starter" ink cartridge in the printer has just dropped down to 1%, not sufficient to proceed if I need to do a cleaning on that channel. I should mention that all of the inks in my 7900 are still the starter inks, the 90ml cartridges that come with the machine. Several are showing 1% on the LCD, and have been for weeks. When a cleaning is required I'm usually asked by the printer to replace those inks. After the cleaning, I've reinstalled the 1% cartridges, and then continued printing as usual.

Update: My friend Dean, who's had a 7900 for several years, ordered ink a month ago from B&H. One of the cartridges he received had an expiration date of August, 2012. He returned it for a "fresher" replacement. The replacement had exactly the same expiration date as the one he'd just returned. Giving up on B&H, Dean returned that ink, and then ordered from IT Supplies. He's not yet received that order. One can only wonder what he'll get.

Update #2: If I'd seen this, I probably wouldn't have made this posting. I've been a little busy, and hadn't looked at the Luminous Landscape forums in several days.

  --Jay